python 2.7如何智能对话_智能对话流程分享
想要了解python 2.7如何进行智能对话吗?别担心,iefans小编将为您详细解析python 2.7智能对话的实现流程!
免费影视、动漫、音乐、游戏、小说资源长期稳定更新! 👉 点此立即查看 👈

1.首先,您需要下载并安装Python 2.7运行环境,可以通过网络搜索“Python 2.7下载安装”来获取。
2.以下是实现智能对话的Python代码:
from aip import AipSpeechimport urllibimport jsonimport requestsimport mp3playimport pyaudioimport waveimport timeAPP_ID = ''API_KEY = ''SECRET_KEY = ''
aipSpeech = AipSpeech(APP_ID, API_KEY, SECRET_KEY)key = ''api = 'https://www.php.cn/link/be800ff41f5c4aa73d8c082d2e00a186=' + key + '&info='url = "https://www.php.cn/link/ede782587d05690823d30d15269a980d"user_id = 'tosobright'
def get_file_content(filePath):with open(filePath, 'rb') as fp:return fp.read()
def getHtml(url):page = urllib.urlopen(url)html = page.read()return html
def getHtml2(data):body = {'key': key, 'info': data.encode('utf8'), 'userid': user_id}r = requests.post(url, data=body)return r.text
while 1:print("------Start-------")p = pyaudio.PyAudio()RECORD_SECONDS = 5stream = p.open(format=8, channels=1, rate=16000, input=True, frames_per_buffer=1024)print(" recording")frames = []for i in range(0, int(16000 / 1024 RECORD_SECONDS)):data = stream.read(1024)frames.append(data)print("* done recording")stream.stop_stream()stream.close()p.terminate()
wf = wave.open("record.pcm", 'wb')wf.setnchannels(1)wf.setsampwidth(p.get_sample_size(8))wf.setframerate(16000)wf.writeframes(b''.join(frames))wf.close()print('* Get Data From Baidu')res = aipSpeech.asr(get_file_content('record.pcm'), 'pcm', 16000, { 'lan': 'zh',})print(res)print(res.get('result')[0].encode('cp936'))print('* Get Data From Tuling')response = getHtml2(res.get('result')[0])dic_json = json.loads(response)print(dic_json['text'])print('* Get mp3 From Baidu')result = aipSpeech.synthesis(dic_json['text'], 'zh', 1, { 'vol': 5,})if not isinstance(result, dict): with open('au.mp3', 'wb') as f: f.write(result)print('* Play mp3')mp3 = mp3play.load('au.mp3')mp3.play()time.sleep(min(30, mp3.seconds()))mp3.close()登录后复制3.接下来,您需要注册一个百度账号,并进入百度AI开放平台下载SDK,同时获取您的个人API凭证:
立即学习“Python免费学习笔记(深入)”;
登录后复制APP_ID = ''API_KEY = ''SECRET_KEY = ''
4.注册图灵机器人账号,并获取图灵API密钥,将其填入代码中的key变量。
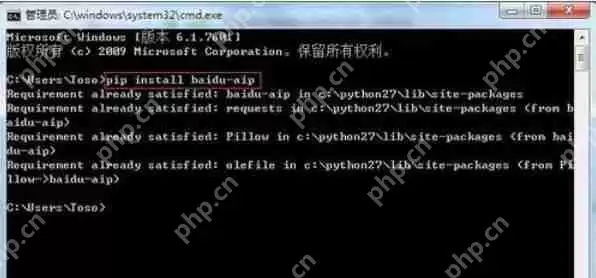
5.安装Python所需的依赖库:
pip install baidu-aippip install requestspip install mp3playpip install pyaudio登录后复制
6.将上述代码保存为ai.py文件,并使用Python IDE打开并运行该文件。
通过以上步骤,您就可以在Python 2.7环境下实现智能对话功能了!
Python 2.7相关攻略推荐:
Python 2.7四舍五入技巧分享Python 2.7运行py文件方法介绍Python 2.7日期时间转换流程分享

相关攻略

Pywinrm 通过Windows远程管理(WinRM)协议,让Python能够像操作本地一样执行远程Windows命令,真正打通了跨平台管理的最后一公里。 在混合IT环境中,Linux机器管理Wi

早些时候,聊过 Python 领域那场惊心动魄的供应链攻击。当时我就感叹,虽然我们 JavaScript 开发者对这类套路烂熟于心,但亲眼目睹这种规模的“投毒”还是头一次。 早些时候,聊过 Pyth

Toga 是 BeeWare 家族的核心成员,号称“写一次,跑遍所有平台”,而且用的是系统原生控件,不是那种一看就是网页套壳的界面 。 写了这么多年 Python,你是不是也想过:要是能一套代码跑

异常处理的核心:让错误在正确的地方被有效处理。正确的地方,就是别在底层就把异常吞了,也别在顶层还抛裸奔的 Exception。 异常处理写得好,半夜不用起来改 bug。1 你是不是也这么干过?tr

1 Skills机制概述 提起OpenClaw的Skills机制,不少人可能会把它想象成传统意义上的可执行插件。其实,它的内涵要更精妙一些。 简单说,Skills本质上是一套基于提示驱动的能力扩展机制。它并不是一个可以独立“跑”起来的程序模块,而是通过一份结构化描述文件(核心就是那个SKILL m
热门专题


热门推荐

稳定币巨头Tether的动向,向来是加密世界的风向标。这不,它向Web3基础设施的版图扩张,又迈出了关键一步。公司执行长Paolo Ardoino在社交平台X上透露,其工程团队正在全力“烹制”一个新项目——去中心化搜索引擎 “Hypersearch”。这个消息一出,立刻引发了行业的广泛猜想。 采用D

基地位于Coinbase旗下以太坊Layer2网络Base的Seamless Protocol,日前正式宣告了服务的终结。这个曾经吸引了超过20万用户的原生DeFi借贷协议,在运营不到三年后,终究没能跑赢时间。它主打的核心产品是Integrated Leverage Markets(ILMs)——一

PAAL代币揭秘:深度解析Web3社区治理的核心钥匙 在去中心化自治组织的浪潮中,谁真正掌握了项目的话语权?PAAL代币提供了一套系统化的答案。它不仅是生态内流转的价值媒介,更是开启链上治理大门的核心凭证。通过持有并质押PAAL代币,用户能够对协议升级、资金分配乃至战略方向等关键事务投出决定性的一票

CTSI代币深度解析:Cartesi网络的灵魂与价值引擎 在飞速演进的Web3世界中,区块链的可扩展性始终是制约其大规模应用的核心瓶颈。Cartesi网络以其独特的“链下计算”方案脱颖而出,而驱动这一精密生态运转的核心燃料,正是CTSI代币。它不仅仅是一种支付媒介,更是集成了支付结算、网络安全、去中

SUI区块链技术深度解析:如何重塑高性能公链格局 当谈到下一代高性能区块链时,SUI区块链凭借其革命性的技术架构,已成为行业无法绕开的焦点。其核心竞争力并非源于单一优化,而是由Move编程语言、以对象为核心的数据模型以及并行执行引擎三者深度协同构成的完整技术体系。更引人注目的是其共识层的创新——Na