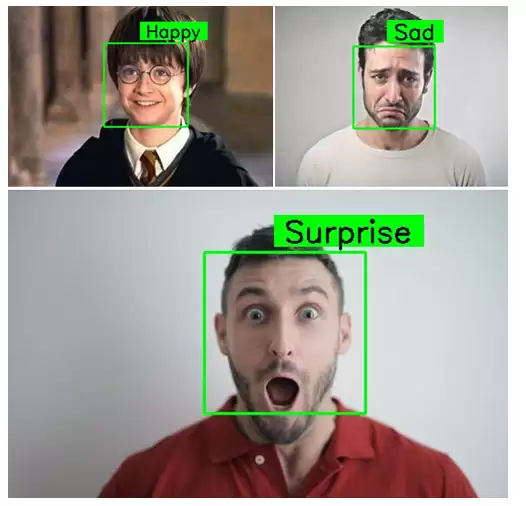
在本教程中,我们将在 Raspberry Pi 4 上实现一个情绪识别系统(也就是面部表情识别系统)。核心思路是利用预训练模型,从实时视频流中识别出人的面部表情。训练模型用到的数据集是 FER2013,网络结构则是一个类似 VGG 的卷积神经网络(CNN)。
面部表情识别系统的应用场景其实相当广泛。它可以用于研究或分析人类的情绪状态;不少公司把它整合到内部系统中,用来监测员工的抑郁倾向;一些游戏公司也在尝试用这个技术来记录玩家在游戏过程中的满意度。接下来,我们就在 Raspberry Pi 上构建一个既简单又实用的表情识别系统。
在树莓派上执行面部表情识别的步骤
整个实现过程可以拆解为三个关键环节:
1. 检测输入视频流中的人脸。
2. 找到人脸的感兴趣区域(ROI)。
3. 应用面部表情识别模型,预测出人的表情。
这里我们定义了六个类别:愤怒、恐惧、快乐、中性、悲伤、惊喜。最终预测的结果会归属于其中之一。事实上,Raspberry Pi 之前已经用在不少图像处理项目上,比如面部标志检测和人脸识别,有兴趣的话也可以翻翻看。
面部表情识别所需的组件
这个项目涉及的硬件很少,只需要:
- Raspberry Pi(推荐 4 代)
- Pi 摄像头模块(或者 USB 摄像头)
软件方面,核心就是在 Pi 上安装带 OpenCV 的环境。OpenCV 负责数字图像处理,这部分的常见应用还包括物体检测、人脸识别和人数统计。
在树莓派 4 上安装 OpenCV
安装 OpenCV 和其他依赖项之前,先把 Raspberry Pi 系统更新到最新版本:
```
sudo apt-get update
```
然后安装 OpenCV 所需的依赖包:
```
sudo apt-get install libhdf5-dev -y
sudo apt-get install libhdf5-serial-dev -y
sudo apt-get install libatlas-base-dev -y
sudo apt-get install libjasper-dev -y
sudo apt-get install libqtgui4 -y
sudo apt-get install libqt4-test -y
```
最后用 pip 安装 OpenCV:
```
pip3 install opencv-contrib-python==4.1.0.25
```
在树莓派 4 上安装 TensorFlow 和 Keras
先装必要的库:
```
sudo apt-get install python3-numpy
sudo apt-get install libblas-dev
sudo apt-get install liblapack-dev
sudo apt-get install python3-dev
sudo apt-get install libatlas-base-dev
sudo apt-get install gfortran
sudo apt-get install python3-setuptools
sudo apt-get install python3-scipy
sudo apt-get update
sudo apt-get install python3-h5py
```
之后用 pip 安装 TensorFlow 和 Keras(如果默认 Python 环境是 Python3,就用 pip3):
```
pip3 install tensorflow
pip3 install keras
```
为面部表情识别编程 Raspberry Pi
项目目录的完整代码可以从官方链接下载(略)。这里我们重点解释代码的关键部分,方便理解。
下载的项目文件夹包含一个子文件夹(Haarcascades)、一个 Python 文件(emotion1.py)和一个预训练模型(ferjj.h5)。
先导入必要的包。注意这里使用的是 TensorFlow API 来调用 Keras 库。
```python
from tensorflow.keras import Sequential
from tensorflow.keras.models import load_model
import cv2
import numpy as np
from tensorflow.keras.preprocessing.image import img_to_array
```
接着加载预训练模型,并创建一个字典,将标签分配给六个类别:
```python
class_labels = {0: 'Angry', 1: 'Fear', 2: 'Happy', 3: 'Neutral', 4: 'Sad', 5: 'Surprise'}
classes = list(class_labels.values())
```
提供 Haarcascade 分类器的路径:
```python
face_classifier = cv2.CascadeClassifier('./Haarcascades/haarcascade_frontalface_default.xml')
```
设计一个函数,用来在检测到的人脸框上叠加文字标签:
```python
def text_on_detected_boxes(text, text_x, text_y, image, font_scale=1,
font=cv2.FONT_HERSHEY_SIMPLEX,
FONT_COLOR=(0, 0, 0),
FONT_THICKNESS=2,
rectangle_bgr=(0, 255, 0)):
(text_width, text_height) = cv2.getTextSize(text, font, fontScale=font_scale, thickness=2)[0]
box_coords = ((text_x-10, text_y+4), (text_x + text_width+10, text_y - text_height-5))
cv2.rectangle(image, box_coords[0], box_coords[1], rectangle_bgr, cv2.FILLED)
cv2.putText(image, text, (text_x, text_y), font, fontScale=font_scale, color=FONT_COLOR, thickness=FONT_THICKNESS)
```
在图像上测试我们的面部表情识别
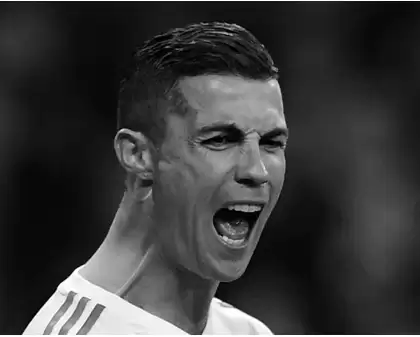
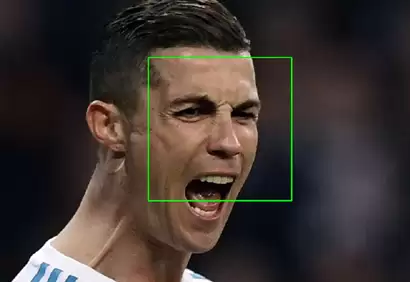
`face_detector_image(img)` 函数负责处理静态图像。它先将图像转为灰度,然后用分类器检测人脸,提取 ROI,并返回相关信息。
```python
def face_detector_image(img):
gray = cv2.cvtColor(img.copy(), cv2.COLOR_BGR2GRAY)
faces = face_classifier.detectMultiScale(gray, 1.3, 5)
if faces is ():
return (0, 0, 0, 0), np.zeros((48, 48), np.uint8), img
allfaces = []
rects = []
for (x, y, w, h) in faces:
cv2.rectangle(img, (x, y), (x + w, y + h), (0, 255, 0), 2)
roi_gray = gray[y:y + h, x:x + w]
roi_gray = cv2.resize(roi_gray, (48, 48), interpolation=cv2.INTER_AREA)
allfaces.append(roi_gray)
rects.append((x, w, y, h))
return rects, allfaces, img
```
接下来,把 ROI 喂给模型进行预测,并将结果叠加到图像上。
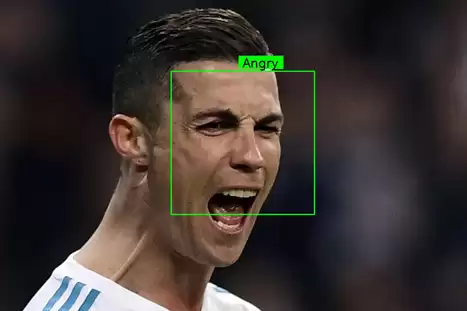
```python
def emotionImage(imgPath):
img = cv2.imread(imgPath)
rects, faces, image = face_detector_image(img)
i = 0
for face in faces:
roi = face.astype("float") / 255.0
roi = img_to_array(roi)
roi = np.expand_dims(roi, axis=0)
preds = classifier.predict(roi)[0]
label = class_labels[preds.argmax()]
label_position = (rects[i][0] + int((rects[i][1] / 2)), abs(rects[i][2] - 10))
i = +1
text_on_detected_boxes(label, label_position[0], label_position[1], image)
cv2.imshow("Emotion Detector", image)
cv2.waitKey(0)
cv2.destroyAllWindows()
```
视频流上的面部表情识别
`face_detector_video(img)` 函数用于视频流。它同样先灰度化,再调用分类器检测人脸,最后返回坐标、ROI 和原帧。
```python
def face_detector_video(img):
gray = cv2.cvtColor(img, cv2.COLOR_BGR2GRAY)
faces = face_classifier.detectMultiScale(gray, 1.3, 5)
if faces is ():
return (0, 0, 0, 0), np.zeros((48, 48), np.uint8), img
for (x, y, w, h) in faces:
cv2.rectangle(img, (x, y), (x + w, y + h), (0, 255, 0), thickness=2)
roi_gray = gray[y:y + h, x:x + w]
roi_gray = cv2.resize(roi_gray, (48, 48), interpolation=cv2.INTER_AREA)
return (x, w, y, h), roi_gray, img
```
下面这个函数将模型应用于视频流的每一帧,并实时显示预测结果。
```python
def emotionVideo(cap):
while True:
ret, frame = cap.read()
rect, face, image = face_detector_video(frame)
if np.sum([face]) != 0.0:
roi = face.astype("float") / 255.0
roi = img_to_array(roi)
roi = np.expand_dims(roi, axis=0)
preds = classifier.predict(roi)[0]
label = class_labels[preds.argmax()]
label_position = (rect[0] + rect[1]//50, rect[2] + rect[3]//50)
text_on_detected_boxes(label, label_position[0], label_position[1], image)
fps = cap.get(cv2.CAP_PROP_FPS)
cv2.putText(image, str(fps), (5, 40), cv2.FONT_HERSHEY_SIMPLEX, 1, (0, 255, 0), 2)
else:
cv2.putText(image, "No Face Found", (5, 40), cv2.FONT_HERSHEY_SIMPLEX, 1, (255, 0, 0), 2)
cv2.imshow('All', image)
if cv2.waitKey(1) & 0xFF == ord('q'):
break
cap.release()
cv2.destroyAllWindows()
```
主函数中,可以选择运行视频模式或图像模式。如果要用图像识别,注释掉前两行,并取消后面两行的注释,同时提供图片路径。
```python
if __name__ == '__main__':
camera = cv2.VideoCapture(0) # 如果用USB摄像头,把0改成1
emotionVideo(camera)
# IMAGE_PATH = "provide the image path"
# emotionImage(IMAGE_PATH)
```
在 Raspberry Pi 上测试我们的面部表情识别系统
启动脚本之前,先把 Pi 摄像头模块正确连接到 Pi,就像下面这样:
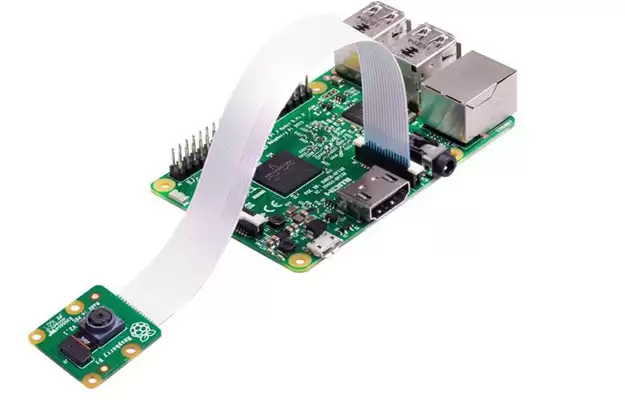
确认摄像头正常工作后,运行 Python 脚本。你会看到一个弹出窗口,显示实时视频源。一旦 Pi 检测到面部表情,就会用绿色框标出,并在框上方显示对应的情绪标签。