
Angular 7工作方式事件绑定
在Angular应用开发中,用户交互——无论是键盘输入、鼠标点击还是鼠标悬停——都会触发一系列事件。而这些事件,恰恰是驱动应用执行特定逻辑的起点。那么,如何在Angular 7中优雅地处理它们?来看看具体的例子就清楚了。
app.component.html
Welcome to {{title}}.
Months :
Condition is valid.
Condition is valid Condition is invalid
先看模板文件 app.component.html。这里定义了一个按钮,然后直接通过(click)语法为其绑定了点击事件——这是Angular事件绑定的标准写法,简洁明了。
(click)="myClickFunction($event)"
$event是Angular自动传入的事件对象,里面包含了所有与本次点击相关的细节信息。
该函数在: app.component.ts 中定义
import { Component } from '@angular/core';
@Component({
   selector: 'app-root',
   templateUrl: './app.component.html',
   styleUrls: ['./app.component.css']
})
export class AppComponent {
   title="Angular 7";

   //declared array of months.
   months=["January", "February", "March", "April", "May","June", "July",
      "August", "September", "October", "November", "December"];

   isa vailable=true; //variable is set to true
   myClickFunction(event) {
      //just added console.log which will display the event details in browser on click of the button.
      alert("Button is clicked");
      console.log(event);
   }
}
对应的组件类里,定义了myClickFunction。当按钮被点击时,控制权会立即跳转到这里:先弹出一个对话框,同时在浏览器控制台打印事件对象的所有信息。
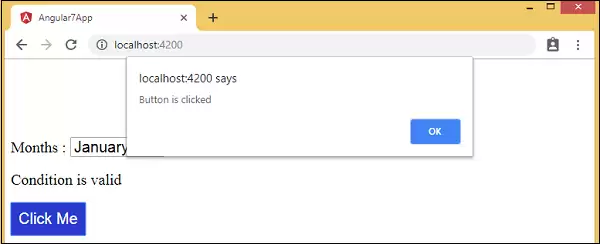
按钮的样式
为了让按钮看起来更专业,可以在add.component.css中添加一些基础样式:
button {
   background-color: #2B3BCF;
   border: none;
   color: white;
   padding: 10px 10px;
   text-align: center;
   text-decoration: none;
   display: inline-block;
   font-size: 20px;
}
这样一来,按钮就有了统一的蓝色背景、白色文字,以及适当的间距——对用户体验来说,这是基本但重要的一步。
change事件添加
除了点击事件,另一个常见场景是监听下拉列表(select)的值变化。具体做法很简单:给select元素加上(change)事件绑定就可以了。
app.component.html
Welcome to {{title}}.
Months :
Condition is valid.
Condition is valid Condition is invalid
app.component.ts 文件中声明
对应的changemonths函数需要在组件类中声明:
import { Component } from '@angular/core';
@Component({
   selector: 'app-root',
   templateUrl: './app.component.html',
   styleUrls: ['./app.component.css']
})
export class AppComponent {
   title="Angular 7";
   //declared array of months.
   months=["January", "Feburary", "March", "April", "May", "June", "July",
      "August", "September", "October", "November", "December"];
   isa vailable=true; //variable is set to true
   myClickFunction(event) {
      //just added console.log which will display the event
      details in browser on click of the button.
      alert("Button is clicked");
      console.log(event);
   }
   changemonths(event) {
      console.log("Changed month from the Dropdown");
      console.log(event);
   }
}
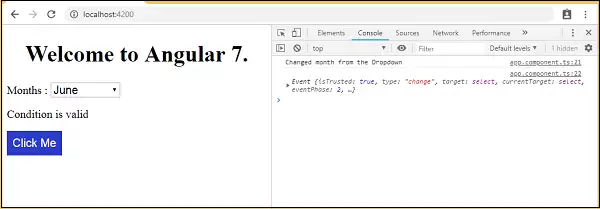
当用户从下拉列表中选择新的月份时,控制台就会输出Changed month from the Dropdown,同时打印事件对象信息。
当然,在实际项目中往往不满足于只在控制台输出消息。更常见的是弹出一个对话框来提醒用户。所以,可以将changemonths函数里的日志替换为alert调用:
import { Component } from '@angular/core';
@Component({
   selector: 'app-root',
   templateUrl: './app.component.html',
   styleUrls: ['./app.component.css']
})
export class AppComponent {
   title="Angular 7";
   //declared array of months.
   months=["January", "February", "March", "April", "May", "June", "July",
      "August", "September", "October", "November", "December"];
   isa vailable=true; //variable is set to true
   myClickFunction(event) {
      //just added console.log which will display the event
      details in browser on click of the button.
      alert("Button is clicked"); console.log(event);
   }
   changemonths(event) {
      alert("Changed month from the Dropdown");
   }
}
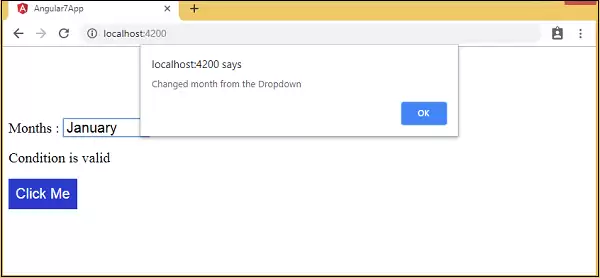
这样一来,每当用户切换下拉列表中的月份,就会立刻看到一个对话框,上面显示着Changed month from the Dropdown。
整个机制的核心思路其实很简单:通过(eventName)="handler($event)"这种声明式语法,将模板中的DOM事件直接映射到组件类的处理方法上。这既保持了模板的清晰,又让逻辑集中在TypeScript代码中——这种分离,正是Angular框架的设计哲学之一。


